
The Ultimate Guide to 2nd Gen 4Runner Mods: Roof Racks, Lighting
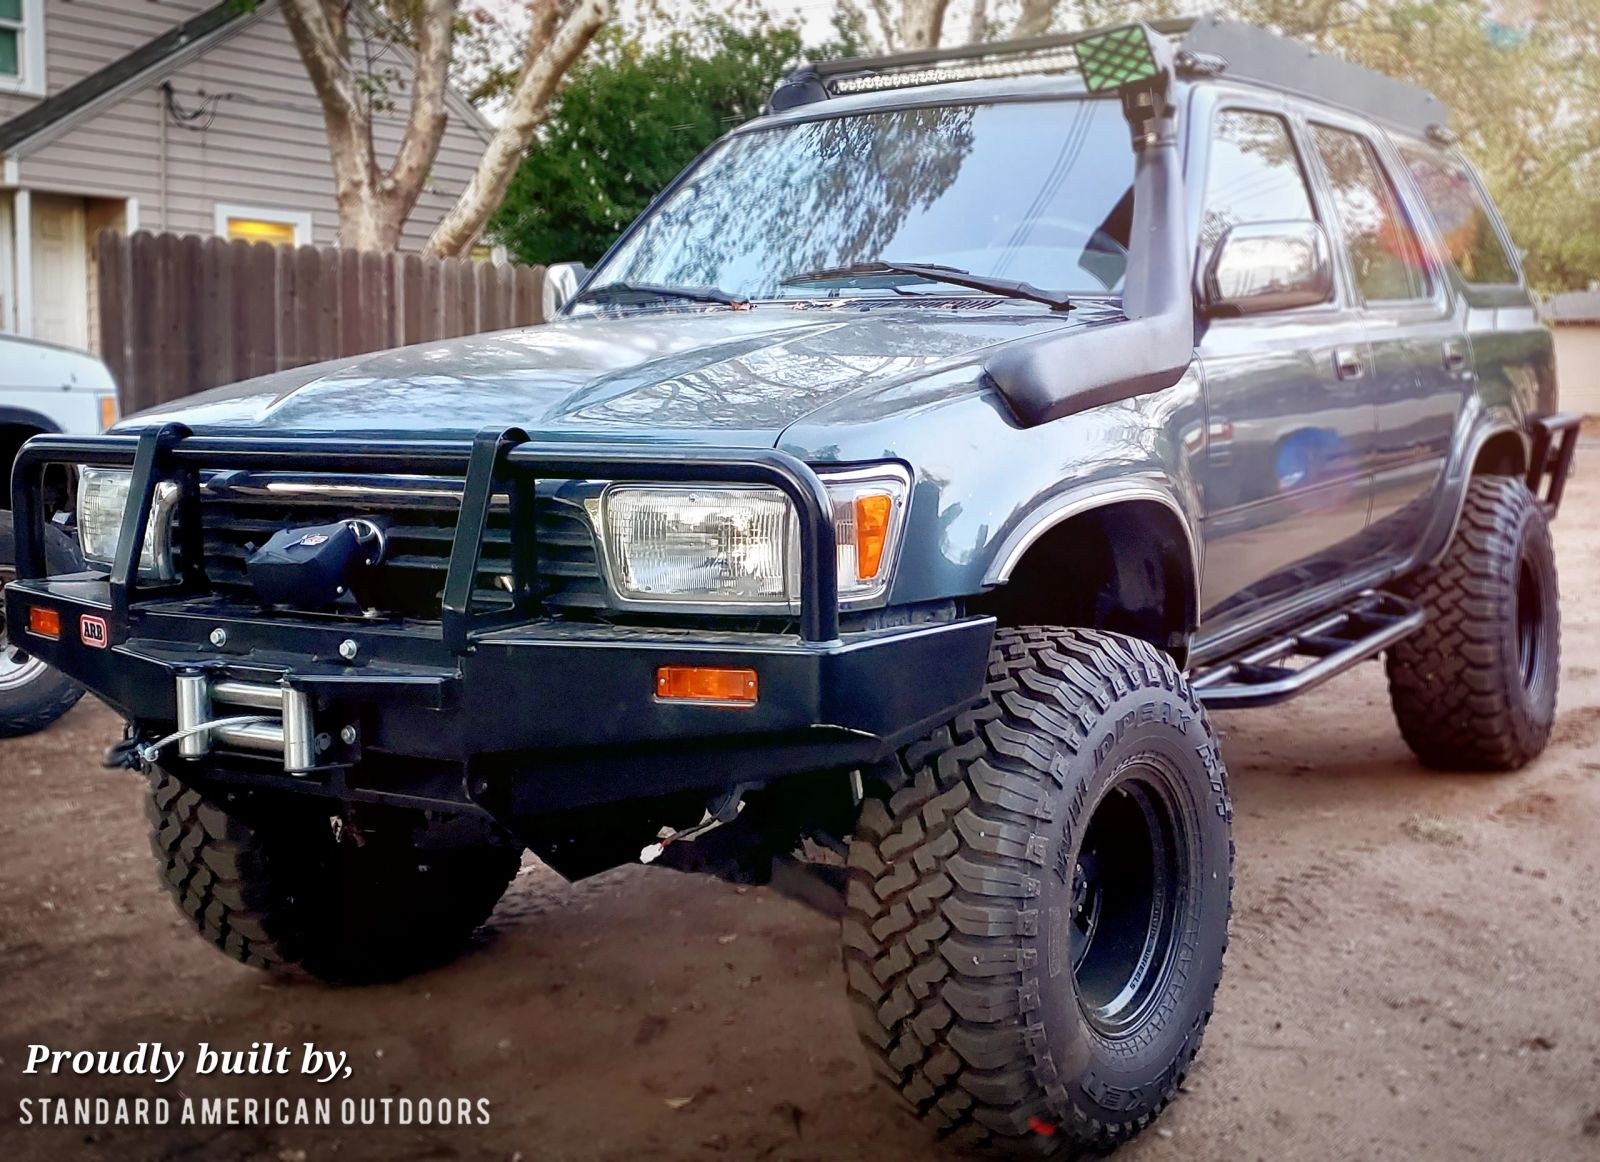
2nd generation Toyota 4Runner. Toyota 4Runner. 1990-1995 1UZ engine swap 4Runner. 2nd gen 4Runner parts. Toyota 4Runner modifications. 2nd gen 4Runner roof rack. Toyota 4Runner V8 conversion. 2nd gen Toyota 4runner lift kit.
The Ultimate Guide to 2nd Gen 4Runner Mods: Roof Racks, Headlights, and Beyond
Welcome to the definitive resource for every 2nd generation Toyota 4Runner owner. If you're passionate about your 1990-1995 4Runner, you understand that it's more than just a vehicle; it's a gateway to adventure, a canvas for customization, and a testament to timeless automotive design. Here at Standard American Outdoors, we share that passion. We live and breathe the 2nd gen 4Runner, and we've dedicated ourselves to providing the community with the knowledge, parts, and inspiration to build the ultimate off-road machine.
This comprehensive guide is the culmination of years of experience, countless hours of research, and a deep-seated love for these iconic SUVs. We're not just creating another list of modifications; we're diving deep into the world of 4runner mods 2nd gen, exploring the nuances of each upgrade, and providing you with the expert insights you need to make informed decisions. Whether you're a seasoned overlander or just starting your journey into the world of 4x4 customization, this article will serve as your roadmap to building a 2nd gen 4Runner that's as unique as your adventures.
In the following sections, we'll embark on a detailed exploration of the most impactful modifications for your 2nd gen 4Runner. We'll start with an in-depth look at the 2nd gen 4runner roof rack, a modification that's essential for any serious adventurer. We'll discuss the different types of roof racks, their pros and cons, and what you need to know about installation. We'll also address the recent announcement regarding the discontinuation of our own roof rack line and provide you with the best alternatives on the market.
Next, we'll illuminate the path ahead with a comprehensive guide to 2nd gen 4runner headlights. From understanding the limitations of the stock headlights to exploring the latest in LED and projector technology, we'll show you how to transform your nighttime visibility and give your 4Runner a modern, aggressive look. We'll review the top headlight upgrades available, including our own "ATOM", "Sinister", and "Everest" models, and provide you with the information you need to choose the perfect lighting solution for your rig.
But we won't stop there. This guide will also cover a wide range of other essential 4runner mods 2nd gen, from suspension lifts and off-road bumpers to engine performance upgrades and interior enhancements. We'll provide you with detailed installation tips, product recommendations, and the expert advice you need to tackle any project with confidence. Our goal is to empower you to build the 2nd gen 4Runner of your dreams, a vehicle that's not only capable and reliable but also a true reflection of your personal style and adventurous spirit.
So, buckle up and get ready to dive into the exciting world of 2nd gen 4Runner modifications. With this guide in hand, you'll have everything you need to transform your stock SUV into a legendary off-road machine. Let's get started!
Understanding the 2nd Gen Toyota 4Runner: A Legacy of Adventure
The second-generation Toyota 4Runner, produced from 1990 to 1995, holds a special place in the hearts of off-road enthusiasts and automotive purists alike. Known for its rugged reliability, capable 4x4 system, and classic styling, the 2nd gen 4Runner has earned a reputation as a true workhorse, equally at home on city streets as it is on challenging trails. Before we delve into the exciting world of modifications, it's crucial to understand the foundation upon which we're building: the inherent strengths and common areas for improvement in this iconic SUV.
A Brief History and Key Features
Introduced as a successor to the first-generation, which was essentially a Toyota pickup truck with a fiberglass shell, the 2nd gen 4Runner marked a significant evolution. It was the first 4Runner to feature a fully integrated body and frame, offering a more refined ride and improved interior comfort. Available in both 2-door and 4-door configurations, it quickly became a popular choice for families and adventurers seeking a versatile vehicle.
Under the hood, the 2nd gen 4Runner typically came with one of two engine options: the 2.4-liter 22R-E four-cylinder or the more powerful 3.0-liter 3VZ-E V6. While both engines were known for their durability, the 3VZ-E V6, in particular, has become a subject of much discussion and modification due to its design and potential for improvement. The 4Runner also featured a robust independent front suspension (IFS) and a solid rear axle, providing a good balance of on-road manners and off-road articulation.
Why the 2nd Gen Endures
Despite being decades old, the 2nd gen 4Runner remains a highly sought-after vehicle for customization and off-road exploration. Several factors contribute to its enduring popularity:
- Reliability: Toyota's legendary reliability is a cornerstone of the 2nd gen 4Runner. With proper maintenance, these vehicles can easily rack up hundreds of thousands of miles.
- Capability: The factory 4x4 system, combined with a sturdy chassis, makes the 2nd gen 4Runner a formidable off-road machine, capable of tackling challenging terrain.
- Simplicity: Compared to modern SUVs, the 2nd gen 4Runner is relatively simple in its mechanical design, making it easier for enthusiasts to work on and modify.
- Aftermarket Support: A thriving aftermarket industry provides a vast array of parts and accessories, allowing owners to customize their vehicles to suit their specific needs and preferences.
- Classic Aesthetics: The boxy, utilitarian design of the 2nd gen 4Runner has a timeless appeal that continues to attract a dedicated fan base.
Common Areas for Improvement and the Appeal of Modifications
While the 2nd gen 4Runner boasts many strengths, there are also areas where modifications can significantly enhance its performance, comfort, and aesthetics. These are often the starting points for many owners looking to personalize their vehicles:
- Power Output: The stock engines, particularly the 3VZ-E V6, can feel underpowered by modern standards, especially when loaded with gear or tackling steep inclines. This often leads owners to explore engine performance modifications or even full engine swaps.
- Suspension Performance: While capable, the factory suspension can be improved for better articulation, increased ground clearance, and a more comfortable ride, especially when carrying extra weight or navigating rough terrain.
- Lighting: The original headlights, while functional, often lack the brightness and beam pattern of modern lighting systems, making nighttime driving and off-road visibility a common concern.
- Cargo Capacity: For overlanding and extended trips, the interior cargo space can be limiting, prompting the need for external storage solutions like roof racks.
- Protection: Off-road adventures inevitably expose the vehicle to potential damage, leading many owners to install aftermarket bumpers, rock sliders, and skid plates for enhanced protection.
Understanding these characteristics is the first step in planning your 4runner mods 2nd gen. Each modification we discuss in this guide is designed to address these areas, transforming your capable stock 4Runner into an even more formidable and personalized adventure vehicle. The journey of modifying a 2nd gen 4Runner is not just about adding parts; it's about enhancing its inherent strengths and tailoring it to your unique vision of adventure.
The Essential Guide to the 2nd Gen 4Runner Roof Rack
For any serious adventurer, a 2nd gen 4runner roof rack is more than just an accessory; it's a fundamental upgrade that unlocks the full potential of your vehicle. The 2nd generation 4Runner, with its classic design and capable 4x4 system, is a fantastic platform for overlanding and off-road exploration. However, its interior cargo space can quickly become a limiting factor when you're packing for extended trips, carrying bulky gear, or traveling with family and friends. This is where a high-quality roof rack comes in, transforming your 4Runner into a versatile gear-hauling machine.
A roof rack provides a secure and convenient platform for transporting a wide range of items, from camping equipment and recovery gear to kayaks, skis, and even a rooftop tent. By moving bulky items to the roof, you free up valuable interior space, making for a more comfortable and organized cabin. Furthermore, a roof rack serves as a versatile mounting point for a variety of accessories, including light bars, awnings, and antennas, allowing you to customize your rig to suit your specific needs.
However, finding the perfect 2nd gen 4runner roof rack can be a challenge. Given the age of the vehicle, the market for direct-fit, high-quality racks is smaller than for newer models. Many universal racks don't fit the unique contours of the 2nd gen's roof, and installation can be a daunting task for the uninitiated. This is why we've created this comprehensive guide to help you navigate the world of 2nd gen 4Runner roof racks and make an informed decision.
Types of 2nd Gen 4Runner Roof Racks
When it comes to choosing a roof rack for your 2nd gen 4Runner, you'll encounter a variety of styles and designs, each with its own set of advantages and disadvantages. Understanding these differences is the first step in selecting the right rack for your needs.
Full-Length vs. Half-Length Racks:
- Full-length racks, as the name suggests, extend over the entire length of the roof, providing the maximum possible cargo space. These are the ideal choice for serious overlanders who need to carry a lot of gear or want to mount a rooftop tent. They distribute the load over a larger area, which is beneficial for carrying heavy items.
- Half-length racks typically cover the rear half of the roof. While they offer less cargo space, they can be a good option for those who only need to carry a few items or want a more minimalist look. They are also generally less expensive and lighter than full-length racks.
Drill vs. No-Drill Installation:
- Drill-in racks require drilling holes in the roof of your 4Runner for installation. While this may sound intimidating, it provides the most secure and stable mounting solution, which is essential for carrying heavy loads or tackling rough terrain. Proper installation, including the use of rivet nuts and a high-quality sealant, is crucial to prevent leaks.
- No-drill racks are designed to mount to the factory roof rails, if your 4Runner is so equipped. These are easier to install and don't require any permanent modifications to your vehicle. However, they are generally not as strong as drill-in racks and have a lower weight capacity.
Materials and Construction:
- Steel racks are known for their strength and durability, making them a popular choice for heavy-duty use. However, they are also heavier than aluminum racks, which can impact your vehicle's center of gravity and fuel economy. It's important to choose a steel rack with a high-quality powder coat finish to prevent rust.
- Aluminum racks are a great option for those who want a strong yet lightweight rack. They are naturally corrosion-resistant and can be just as strong as steel racks when properly designed. Aluminum racks are often more expensive than their steel counterparts.
| Roof Rack Type | Pros | Cons |
| :--- | :--- | :--- |
| Full-Length | Maximum cargo space, ideal for rooftop tents, better load distribution | Heavier, more expensive, can be more difficult to install |
| Half-Length | Lighter, less expensive, easier to install | Less cargo space, may not be suitable for rooftop tents |
| Drill-In | Most secure mounting, highest weight capacity | Requires drilling holes in the roof, more complex installation |
| No-Drill | Easy to install, no permanent modifications | Lower weight capacity, less secure than drill-in racks |
| Steel | Very strong and durable, less expensive | Heavier, can rust if not properly coated |
| Aluminum | Lightweight, corrosion-resistant, strong | More expensive than steel |
Standard American Outdoors Roof Rack: The Evolution Continues
Here at Standard American Outdoors, we've always been committed to providing the 2nd gen 4Runner community with the highest quality parts and accessories. For years, our V2 and V3 roof racks have been a popular choice for enthusiasts seeking a durable, functional, and stylish solution. As our company has grown and evolved, we've made the decision to pause production of our current roof rack line to focus on developing the next generation of innovation for the 2nd gen 4Runner.
We want to assure our customers that we will continue to stand behind our products and provide support to those who have purchased our roof racks. We will also be selling our remaining inventory of V2 and V3 racks while supplies last. We are incredibly proud of the roof racks we've produced and the adventures they've enabled. The knowledge and experience we've gained from these designs will inform our future product development as we continue to serve this amazing community.
Choosing the Right Roof Rack for Your Build
When selecting a 2nd gen 4runner roof rack, it's essential to consider your specific needs and use case. Think about the type of gear you'll be carrying, whether you plan to mount a rooftop tent, and how much weight capacity you require. The market offers various options, from universal racks that can be adapted to fit to custom-fabricated solutions. For those with fabrication skills, building a custom rack can be a rewarding project that results in a truly unique setup tailored to your exact specifications.
Regardless of which route you choose, prioritize quality materials and proper installation. A roof rack is a significant investment that will serve you for years to come, so it's worth taking the time to research your options and choose wisely. The right rack will transform your 4Runner into a versatile adventure platform capable of carrying everything you need for extended expeditions.
Roof Rack Installation: A General Guide
Installing a 2nd gen 4runner roof rack, especially a drill-in model, can be a significant undertaking. While we always recommend professional installation if you're not comfortable with the process, here is a general guide to give you an idea of what's involved:
1. Gather Your Tools: You'll need a drill, a set of drill bits, a rivet nut tool, a tape measure, a marker, and a high-quality sealant.
2. Measure and Mark: Carefully measure and mark the locations for the drill holes according to the manufacturer's instructions. Double-check your measurements before drilling.
3. Drill the Holes: Start with a small pilot hole and gradually increase the size of the drill bit until you reach the correct diameter for the rivet nuts.
4. Install the Rivet Nuts: Use a rivet nut tool to install the rivet nuts in the drilled holes. This will provide a strong and secure mounting point for the rack.
5. Apply Sealant: Apply a generous amount of high-quality sealant around the rivet nuts to create a weather-tight seal and prevent leaks.
6. Mount the Rack: With the help of a friend, carefully lift the rack into place and bolt it to the rivet nuts. Make sure to use the correct hardware and torque the bolts to the manufacturer's specifications.
7. Inspect and Test: Once the rack is installed, carefully inspect your work and test the rack for stability. It's also a good idea to water-test the roof to ensure there are no leaks.
Essential Roof Rack Accessories
Once you have your 2nd gen 4runner roof rack installed, the fun really begins. A roof rack is a platform for a wide range of accessories that can enhance your overlanding and off-road adventures. Here are a few of our favorites:
- Rooftop Tents: A rooftop tent is the ultimate overlanding accessory, providing a comfortable and convenient place to sleep off the ground.
- Awnings: An awning provides shelter from the sun and rain, creating a comfortable outdoor living space.
- Light Bars: A light bar mounted to your roof rack can dramatically improve your nighttime visibility on the trails.
- Recovery Gear Mounts: Keep your recovery gear, such as traction boards and high-lift jacks, secure and accessible with dedicated mounts.
- Cargo Boxes: A cargo box is a great way to keep your gear organized, secure, and protected from the elements.
Choosing the right 2nd gen 4runner roof rack is a significant decision that will have a major impact on the functionality and versatility of your vehicle. By carefully considering your needs, understanding the different types of racks available, and following proper installation procedures, you can find the perfect solution for your adventures. And while we may no longer be producing our own roof racks, we are more committed than ever to providing you with the knowledge and resources you need to build the ultimate 2nd gen 4Runner.
Illuminating the Path Ahead: A Deep Dive into 2nd Gen 4Runner Headlights
If there is one modification that universally transforms the driving experience of a 2nd generation 4Runner, it is upgrading the headlights. The original factory headlights, while adequate for their time, simply cannot compare to the performance and clarity of modern lighting technology. For many owners, the dim, yellowed output of the stock headlights is not just an aesthetic issue; it is a significant safety concern, especially when navigating dark backroads or challenging off-road trails at night. A high-quality 2nd gen 4runner headlights upgrade is an essential investment that enhances safety, boosts confidence, and dramatically modernizes the look of your classic SUV.
Here at Standard American Outdoors, we believe that exceptional lighting is non-negotiable. That's why we have invested countless hours in developing and sourcing the best lighting solutions specifically for the 1990-1995 4Runner. This section will serve as your complete guide to understanding the factory headlight systems, exploring the various upgrade paths, and choosing the perfect set of headlights to illuminate your adventures.
The Challenge with Stock 2nd Gen Headlights
The 2nd gen 4Runner came with two primary types of headlights, depending on the model year. The 1990-1991 models were equipped with sealed-beam headlights, an older technology where the bulb and reflector are a single, sealed unit. When the bulb burns out, the entire unit must be replaced. The 1992-1995 models featured a more modern composite design with a plastic lens and a replaceable halogen bulb.
Regardless of the type, both systems suffer from similar drawbacks:
- Poor Light Output: The stock halogen bulbs and reflector designs produce a dim, scattered light pattern that offers limited visibility, especially by today's standards.
- Outdated Technology: Halogen technology is inefficient and has a shorter lifespan compared to modern LED and HID systems.
- Lens Degradation: The plastic lenses on the 92-95 models are prone to yellowing and hazing over time due to UV exposure, further reducing light output and creating a dated appearance.
- Limited Beam Control: The factory reflector housings do a poor job of focusing the light, leading to significant glare for oncoming drivers and a lack of a defined beam pattern on the road.
These limitations make a headlight upgrade one of the most impactful 4runner mods 2nd gen you can perform. It's a modification that you will appreciate every single time you drive your vehicle at night.
Exploring Your Headlight Upgrade Options
When it comes to upgrading your 2nd gen 4runner headlights, there are several paths you can take, ranging from simple bulb replacements to full-scale projector retrofits. It's crucial to understand the pros and cons of each option to make an informed decision.
1. Simple LED Bulb Replacements
This is often the first step many owners consider due to the low cost and ease of installation. However, simply placing a "plug-and-play" LED bulb into the factory reflector housing is not recommended. The stock reflector is designed for the 360-degree light output of a halogen bulb. LED bulbs emit light from specific points (diodes), and when placed in a reflector housing, they create an uncontrolled, scattered beam pattern. While the light may appear brighter up close, it results in massive glare for other drivers and poor down-road visibility.
2. H4 Conversion Housings
For owners of 1990-1991 models with sealed-beam headlights, an H4 conversion is a popular upgrade. This involves replacing the sealed-beam unit with a new housing that accepts a modern, replaceable H4 bulb. This opens the door to using higher-quality halogen bulbs or, preferably, serves as a better base for a proper projector retrofit.
3. Full Projector Retrofits: The Ultimate Solution
A projector retrofit is, without a doubt, the best lighting upgrade you can perform on a 2nd gen 4Runner. This process involves installing a dedicated projector lens system into the headlight housing. The projector's lens and cutoff shield work together to focus the light into a precise, controlled beam pattern.
- Sharp Cutoff: This creates a distinct line between the illuminated area and the area above it, preventing glare from blinding oncoming drivers.
- Focused Intensity: All of the light is directed exactly where you need it – on the road. This results in a dramatic increase in usable light output and long-distance visibility.
- Modern Aesthetics: Projector headlights give the 2nd gen 4Runner a modern, high-end look that sets it apart from the crowd.
At Standard American Outdoors, we specialize in high-quality projector retrofits because we believe they offer the perfect combination of safety, performance, and style.
Standard American Outdoors: The Pinnacle of 2nd Gen 4Runner Lighting
We have poured our passion and expertise into creating a lineup of projector headlights that are second to none. Each of our models is designed to be a direct-fit, high-performance solution for your 1990-1995 4Runner. Let's take a closer look at our exclusive offerings.
The "ATOM" LED Projector Headlight
The ATOM is a marvel of compact power. Designed exclusively for the 92-95 4Runner, this headlight packs an incredible punch with its "Twin Kilo" 46-watt high-output LED system. The ATOM provides a wide, evenly distributed beam pattern with a razor-sharp cutoff, ensuring you can see everything on the road ahead without distracting other drivers. It's the perfect choice for the owner who wants a clean, modern look combined with exceptional performance.
The "Sinister" LED Projector Headlight
Our bestseller, the "Sinister," is for those who want to make a bold statement. This headlight features a blacked-out housing and an aggressive design that completely transforms the front end of your 4Runner. But the Sinister isn't just about looks; it's a true performance powerhouse. The bi-LED projector provides both a powerful low beam and an incredible high beam, turning night into day at the flick of a switch. With nine positive reviews, the Sinister has proven itself as a fan favorite and a top-tier 4runner mods 2nd gen.
The "Everest" LED Projector Headlight
The "Everest" is built for the most demanding adventures. This headlight is engineered for maximum light output, providing a long-range, penetrating beam that is ideal for high-speed desert runs and navigating technical trails in the dark. The Everest features a robust construction and a meticulously engineered beam pattern that prioritizes both distance and width, ensuring you have complete situational awareness in any environment.
The "Apollo" LED Projector Headlight
The Apollo is our tribute to classic design with a modern twist. It offers a more traditional look while still incorporating the superior performance of a bi-LED projector system. The Apollo is a fantastic all-around performer, delivering a perfect balance of style, output, and reliability. It's an excellent choice for the owner who appreciates a subtle, factory-plus aesthetic.
| SAO Headlight Model | Key Feature | Ideal For | Price |
| :--- | :--- | :--- | :--- |
| The "ATOM" | Compact, high-output "Twin Kilo" LED system | Clean, modern look with excellent performance | $499.00 |
| The "Sinister" | Aggressive blacked-out design, bi-LED projector | Making a bold statement, maximum style | $499.99 |
| The "Everest" | Maximum light output, long-range beam | Demanding off-road adventures, high-speed driving | $499.00 |
| The "Apollo" | Classic design with modern bi-LED performance | A subtle, factory-plus aesthetic with great output | *Check Site* |
For those on a tighter budget or looking for a clean, factory-fresh look, we also offer 92.5/95 Toyota 4Runner DEPO Style headlights. These are high-quality replacement housings that can be used with your stock bulbs or serve as the perfect starting point for your own custom projector retrofit project.
Headlight Installation and Aiming: A Step-by-Step Guide
Installing your new 2nd gen 4runner headlights is a straightforward process that can be completed in an afternoon with basic hand tools. Proper aiming is a critical final step to ensure you get the full benefit of your upgrade.
Installation Steps:
1. Remove the Grille: The front grille is typically held in place by a series of clips and screws. Carefully remove them to gain access to the headlight area.
2. Remove the Corner Lights: The corner lights are usually held in by a single screw. Remove the screw and slide the light forward to release it.
3. Unbolt the Headlight Housing: Each headlight housing is secured by four bolts. Remove these bolts and carefully pull the housing forward.
4. Disconnect the Wiring: Disconnect the wiring harness from the back of the headlight housing.
5. Install the New Housing: Connect the wiring for your new projector headlights. This may involve a new harness that connects directly to the battery for stable power. Mount the new housing and secure it with the four bolts.
6. Reassemble: Reinstall the corner lights and the grille.
Proper Headlight Aiming:
Properly aiming your new projector headlights is crucial for safety and performance.
1. Find a Level Surface: Park your 4Runner on a level surface facing a wall or garage door, about 25 feet away.
2. Measure and Mark: Measure the height from the ground to the center of your headlight projectors. Mark this height on the wall with a horizontal line of tape.
3. Adjust the Cutoff: Turn on your low beams. The top of the beam pattern's cutoff line should be about 2 inches *below* the horizontal line you marked on the wall. This ensures your lights are aimed slightly downward and won't blind other drivers.
4. Fine-Tune: Use the adjustment screws on the back of the headlight housing to move the beam up/down and left/right until the cutoff is perfectly level and aimed correctly.
Upgrading to a set of high-performance projector headlights from Standard American Outdoors is one of the most rewarding modifications you can make to your 2nd gen 4Runner. It's an investment in safety, a boost in confidence, and a significant aesthetic enhancement. Don't spend another night struggling with dim, outdated headlights. Illuminate your path and transform your 4Runner today.
Beyond the Basics: Other Essential 4Runner Mods 2nd Gen
While a high-quality 2nd gen 4runner roof rack and a set of powerful 2nd gen 4runner headlights are foundational upgrades, they are just the beginning of the journey. To build a truly capable and well-rounded off-road machine, you need to look beyond the basics and consider a range of other essential 4runner mods 2nd gen. These modifications work in harmony to enhance your vehicle's performance, durability, and functionality, allowing you to push the limits of your adventures with confidence.
In this section, we will explore the most impactful upgrades you can make to your 1990-1995 4Runner, from suspension systems that conquer the toughest trails to armor that protects your investment. We'll draw on our deep expertise here at Standard American Outdoors to guide you through the best options on the market, including some of the top-selling products from our own shop.
Suspension Lifts: The Foundation of Off-Road Capability
Perhaps the most significant performance-enhancing modification you can make to your 2nd gen 4Runner is upgrading the suspension. A well-designed suspension lift is the key to unlocking your vehicle's true off-road potential. It provides a multitude of benefits:
- Increased Ground Clearance: Lifting your 4Runner provides more clearance between the chassis and the ground, allowing you to navigate over obstacles like rocks, logs, and ruts without causing damage to your undercarriage.
- Fit Larger Tires: A suspension lift creates the necessary space to fit larger, more aggressive off-road tires, which provide better traction and further increase your ground clearance.
- Improved Articulation: A quality suspension system allows your wheels to travel further up and down, keeping your tires in contact with the ground on uneven terrain for maximum traction and stability.
- Enhanced Ride Quality: Contrary to popular belief, a good suspension lift can actually improve your on-road ride quality, especially when paired with high-quality shocks that can better absorb bumps and imperfections in the road.
When considering a suspension lift, it's important to choose a complete, well-engineered system rather than piecing together individual components. A complete kit ensures that all the components are designed to work together, providing optimal performance and reliability.
Our Top Recommendation: The SAO 89-95 Toyota 4Runner 3-Inch Complete Lift Kit
We are incredibly proud to offer what we believe is the best all-around suspension solution for the 2nd gen 4Runner. Our 89-95 Toyota 4runner 3 inch complete lift kit is a comprehensive, bolt-on system that will transform your vehicle's capabilities. This kit, one of our bestsellers, includes:
- High-Quality Shocks: Custom-valved shocks that provide a perfect balance of on-road comfort and off-road control.
- Durable Springs: New front and rear springs that provide the advertised 3 inches of lift while handling the extra weight of off-road gear.
- Upper Control Arms (UCAs): Aftermarket UCAs are essential for correcting the suspension geometry after a lift, ensuring proper alignment and preventing premature wear on your tires and ball joints.
- Differential Drop: A differential drop kit lowers the front differential to reduce the angle of the CV axles, preventing excessive wear and potential failure.
This complete kit provides everything you need to properly lift your 2nd gen 4Runner, giving it a more aggressive stance and the performance to back it up. It is one of the most effective 4runner mods 2nd gen you can invest in.
Off-Road Bumpers: Protection, Recovery, and Style
As you venture further off the beaten path, the factory plastic bumpers will quickly reveal their limitations. An aftermarket off-road bumper is a crucial upgrade for any serious off-roader, offering a trifecta of benefits: protection, recovery capability, and aggressive styling.
- Protection: A heavy-duty steel or aluminum bumper provides robust protection for the front and rear of your 4Runner, safeguarding your grille, headlights, and body panels from impacts with rocks, trees, and other obstacles.
- Improved Angles: Off-road bumpers are designed with high-clearance wings that significantly improve your approach and departure angles, allowing you to tackle steeper obstacles without scraping.
- Winch Integration: Most front bumpers are designed to accommodate a winch, a critical recovery tool that allows you to pull yourself or others out of tough situations.
- Accessory Mounting: Bumpers provide a solid mounting point for a variety of accessories, including auxiliary lights, antennas, and high-lift jacks.
While we don't currently offer our own line of bumpers, there are several excellent options on the market from reputable fabricators. Look for bumpers that are specifically designed for the 1990-1995 4Runner to ensure a proper fit. Consider the material (steel for maximum strength, aluminum for weight savings) and the features you need, such as a winch mount and recovery points.
Engine Performance: Unleashing More Power
The 3.0-liter 3VZ-E V6, while reliable, is often criticized for its modest power output. When you add the weight of larger tires, a roof rack, and other gear, the engine can feel strained. Fortunately, there are several 4runner mods 2nd gen that can help you squeeze more performance out of your engine.
- Intake and Exhaust: A cold air intake and a free-flowing cat-back exhaust system can help the engine breathe better, resulting in a modest increase in horsepower and torque, as well as a more aggressive exhaust note.
- Headers: Aftermarket headers are one of the most effective ways to improve the performance of the 3VZ-E. They replace the restrictive factory exhaust manifolds, allowing exhaust gases to flow more freely and significantly improving engine efficiency.
SAO Power Steering Idle Up Valve Delete Kit
For those looking to simplify their engine bay and eliminate a potential point of failure, our Power Steering Idle Up Valve Delete Kit for 3VZ, 22RE & 1UZ is a must-have. This kit allows you to remove the unnecessary power steering idle-up valve, cleaning up your engine bay and creating a more reliable system. It's a small but impactful modification that reflects our philosophy of practical, performance-oriented upgrades.
For those seeking a major power increase, an engine swap is the ultimate solution. The Lexus 1UZ-FE V8 is a popular choice due to its lightweight aluminum construction, reliability, and significant power gains. Our blog features extensive documentation of our own 1UZ swap projects, providing a wealth of information for those considering this advanced modification.
Wheels and Tires: The Point of Contact
No off-road build is complete without a proper set of wheels and tires. This is where the rubber meets the road—or the trail—and the right combination can have a profound impact on your vehicle's performance and appearance.
- Tires: Choosing the right tires is critical. All-Terrain (A/T) tires offer a great balance of on-road comfort and off-road traction, making them a popular choice for daily drivers that also see trail duty. Mud-Terrain (M/T) tires provide maximum traction in loose, muddy, and rocky conditions but are typically louder and wear faster on the pavement.
- Wheels: Aftermarket wheels can provide a more aggressive stance and are often stronger than the factory wheels. When choosing wheels, pay close attention to the backspacing and offset, as this will determine how far the wheels stick out from the vehicle. Proper backspacing is crucial to prevent the tires from rubbing on the suspension components or body.
Armor and Protection: Shielding Your Investment
Off-roading inevitably involves the risk of damage to your vehicle's vulnerable underbelly. A set of rock sliders and skid plates is cheap insurance against costly repairs.
- Rock Sliders: Rock sliders are heavy-duty steel tubes that bolt to the frame of your 4Runner and run along the length of the rocker panels. They provide robust protection against rocks and other obstacles, and they can also be used as a pivot point to maneuver around tight corners on the trail.
- Skid Plates: Skid plates are metal plates that bolt to the underside of your vehicle to protect critical components like the engine oil pan, transmission, transfer case, and fuel tank.
SAO HD Adjustable Panhard Bar
While not armor in the traditional sense, our 100% American made HD Adjustable Panhard Bar is a crucial component for protecting your drivetrain. After lifting your 4Runner, the rear axle can shift to one side. An adjustable panhard bar allows you to re-center the axle, ensuring proper alignment and preventing premature wear on your tires and suspension components. It's a testament to our commitment to providing solutions for every aspect of your 2nd gen 4Runner build.
By thoughtfully selecting and installing these essential 4runner mods 2nd gen, you can build a vehicle that is not only incredibly capable but also a true reflection of your adventurous spirit. At Standard American Outdoors, we are here to support you every step of the way with high-quality parts, expert advice, and a shared passion for the legendary 2nd generation Toyota 4Runner.
Planning Your Build: A Phased Approach to Modification
Embarking on the journey of modifying your 2nd gen 4Runner is an exciting prospect, but it can also be overwhelming. With a seemingly endless list of potential upgrades, it's easy to get lost in the details and lose sight of your goals. A structured, phased approach is the key to a successful and satisfying build. This method allows you to prioritize modifications, manage your budget effectively, and progressively build upon a solid foundation, ensuring that each upgrade complements the others.
This section will outline a logical, three-phase approach to your 4runner mods 2nd gen project. This framework is designed to be flexible, allowing you to adapt it to your specific needs, budget, and timeline. By thinking about your build in these distinct stages, you can create a clear roadmap that will guide you from a stock SUV to a fully capable and personalized adventure rig.
Phase 1: The Foundation - Wheels, Tires, and Suspension
The first phase is all about creating a solid foundation. These initial modifications are the building blocks upon which all future upgrades will depend. The focus here is on enhancing your 4Runner's core off-road capability and creating the necessary platform for more advanced modifications.
1. Wheels and Tires: The Point of Contact
Your tires are the single most important component for off-road performance. They are the only part of your vehicle that actually touches the trail. Upgrading from the factory street-oriented tires to a set of high-quality All-Terrain (A/T) or Mud-Terrain (M/T) tires will have the most immediate and dramatic impact on your vehicle's traction and capability. When selecting tires, consider the type of terrain you will be frequenting most often. A/T tires are the perfect all-around choice for most users, offering a great compromise between on-road manners and off-road grip. M/T tires are for the serious off-roader who prioritizes maximum traction in the most challenging conditions.
When you upgrade your tires, you should also consider your wheels. Aftermarket wheels can provide a more aggressive stance and are often stronger than the factory offerings. Pay close attention to the wheel's backspacing and offset, as this will determine the track width of your vehicle and is crucial for preventing your new, larger tires from rubbing on the suspension components or the body.
2. Suspension Lift: The Key to Capability
Once you have your new wheels and tires, the next logical step is a suspension lift. As we discussed in detail earlier, a lift kit like our SAO 89-95 Toyota 4runner 3 inch complete lift kit is essential for creating the clearance needed for larger tires and for improving your vehicle's ground clearance and articulation. It is critical to install the suspension lift *after* or *at the same time* as your new tires. Installing a lift with small, factory-sized tires will look disproportionate and will not provide the full performance benefit.
A complete, well-engineered kit is paramount. It should include not only springs and shocks but also essential components like aftermarket Upper Control Arms (UCAs) to correct alignment geometry and a differential drop to protect your CV axles. This foundational phase is not the place to cut corners. A properly installed, high-quality suspension system will provide a safe and reliable platform for all your future adventures.
Phase 2: Functionality and Protection - Racks, Armor, and Lighting
With the foundational elements of your build in place, Phase 2 focuses on enhancing the functionality of your 4Runner and protecting your investment from the rigors of the trail. These modifications are about making your vehicle more practical, versatile, and durable.
1. Roof Rack: Expanding Your Horizons
Now that your 4Runner has a more capable stance, it's time to address its cargo-carrying limitations. A 2nd gen 4runner roof rack is the key to unlocking your vehicle's overlanding potential. As detailed previously, a full-length, drill-in rack provides the most secure and versatile platform for a rooftop tent, an awning, recovery gear, and extra fuel. This upgrade transforms your 4Runner from a weekend warrior into a self-sufficient exploration vehicle.
2. Armor and Skid Plates: Your Mechanical Insurance Policy
As you begin to tackle more challenging trails, you will inevitably encounter rocks, ledges, and other obstacles that can wreak havoc on your vehicle's vulnerable underbelly. Rock sliders are essential for protecting your rocker panels, which are easily damaged and expensive to repair. A full set of skid plates, covering your engine, transmission, and fuel tank, provides crucial protection for your drivetrain. Think of armor as an insurance policy; you hope you never have to use it, but you'll be incredibly glad it's there when you do.
3. Headlight Upgrade: Conquering the Darkness
Safety and functionality go hand in hand. As your adventures begin to extend after sunset, you will quickly realize the inadequacy of the factory headlights. Upgrading to a high-performance projector system, such as our SAO "Sinister" or "Everest" models, is a critical safety upgrade. The powerful, focused beam pattern of a projector headlight will dramatically improve your nighttime visibility, allowing you to spot obstacles on the trail and drive with more confidence. This is one of the most important 4runner mods 2nd gen for anyone who plans to do any serious night-time wheeling.
Phase 3: Performance and Personalization
In Phase 3, with the core functional and protective elements in place, you can now focus on fine-tuning your vehicle's performance and adding the personal touches that make it uniquely yours.
1. Engine Performance and Drivetrain
Now that your 4Runner is heavier with the addition of larger tires, armor, and gear, you may start to notice the engine feeling a bit strained. This is the time to consider performance modifications. Upgrades like headers, a free-flowing exhaust, and a cold air intake can help your engine breathe better and reclaim some lost power. For those seeking a major performance boost, this is the phase where you might consider an engine swap, such as the popular 1UZ V8 conversion.
You might also consider re-gearing your differentials. When you install larger tires, you effectively change your final drive ratio, which can make your vehicle feel sluggish and cause your transmission to hunt for gears. Installing gears with a higher numerical ratio will restore your vehicle's performance and take the strain off your drivetrain.
2. Recovery Gear and On-Board Systems
This is the stage to equip your rig with the tools you need to get yourself out of trouble. A winch mounted to an aftermarket front bumper is the ultimate recovery tool. An on-board air compressor is incredibly useful for re-inflating your tires after a day on the trail and can also be used to power air lockers. A dual battery system will allow you to run accessories like a refrigerator and camp lights without fear of draining your starting battery.
3. Interior and Comfort
Finally, focus on making your 4Runner a more comfortable and organized space. Upgrades like seat covers, custom storage solutions, and a modern stereo system can make a big difference on long trips. This is where you can truly personalize your rig and make it your home away from home.
By following this phased approach, you can build your dream 2nd gen 4Runner in a logical, manageable, and rewarding way. Remember that the journey is just as important as the destination. Enjoy the process, learn along the way, and build a vehicle that will create a lifetime of memories.
Installation Deep Dive: Step-by-Step Guides for Key 4Runner Mods
At Standard American Outdoors, we believe in empowering the 2nd gen 4Runner community. While we've discussed *what* modifications to make, this section is dedicated to the *how*. A successful build is not just about choosing the right parts; it's about installing them correctly and safely. Proper installation ensures that your 4runner mods 2nd gen perform as intended and don't lead to costly failures down the road.
This installation deep dive will provide detailed, step-by-step instructions for some of the most common and critical upgrades. We will cover the installation of a suspension lift, the precise process for mounting a drill-in 2nd gen 4runner roof rack, and the essential steps for installing and aiming your new 2nd gen 4runner headlights. Please remember that these are general guides; always refer to the specific instructions provided by the manufacturer of your parts. If you are ever in doubt, we strongly recommend seeking the help of a qualified professional.
Guide 1: Installing a 3-Inch Suspension Lift Kit
Installing a suspension lift is a significant undertaking, but it is well within the capabilities of a home mechanic with the right tools and a patient, methodical approach. This guide will walk you through the general process of installing a kit like our SAO 89-95 Toyota 4runner 3 inch complete lift kit.
Tools and Preparation:
- Safety First: Always use jack stands to support the vehicle securely. Never work under a vehicle supported only by a jack. Wear safety glasses.
- Essential Tools: A good set of metric sockets and wrenches, a torque wrench, a floor jack, at least two jack stands, a ball joint separator (pickle fork or press), spring compressors (for the front), and penetrating oil.
- Preparation: Soak all relevant nuts and bolts in penetrating oil for a few hours (or even overnight) before you begin. This will make the disassembly process much easier.
Front Suspension Installation:
1. Lift and Support: Loosen the lug nuts on the front wheels. Lift the front of the vehicle with a floor jack and place jack stands securely under the frame rails.
2. Remove Wheels and Shocks: Remove the front wheels. Unbolt the factory shock absorber at the top and bottom and remove it.
3. Disconnect Sway Bar and Tie Rods: Disconnect the sway bar end links from the lower control arms. Use a ball joint separator to disconnect the outer tie rod ends from the steering knuckles.
4. Separate Upper Ball Joint: Remove the cotter pin and castle nut from the upper ball joint. Use a ball joint separator to separate the upper control arm (UCA) from the steering knuckle.
5. Remove the Factory Coil and UCA: Support the lower control arm with a floor jack. Carefully remove the factory coil spring. You may need to use a spring compressor for safety. Once the spring is out, unbolt and remove the factory upper control arm.
6. Install New UCA and Differential Drop: Install your new aftermarket UCA. This is also the perfect time to install the differential drop kit, which involves placing spacers between the front differential and its mounting crossmember.
7. Install New Coil Spring and Shock: Install the new, longer coil spring and the new shock absorber. Reconnect the UCA to the steering knuckle, the tie rod end, and the sway bar end link.
8. Repeat on Other Side: Repeat the entire process on the other side of the vehicle.
Rear Suspension Installation:
1. Lift and Support: Chock the front wheels. Lift the rear of the vehicle and place jack stands under the frame rails, just in front of the rear wheels. Allow the rear axle to hang freely.
2. Remove Shocks and Sway Bar: Unbolt the rear shocks at the top and bottom. Disconnect the rear sway bar end links.
3. Lower the Axle: Slowly lower the rear axle with the floor jack until the factory coil springs can be removed. Be careful not to overextend the brake lines. A longer aftermarket brake line is often recommended with a 3-inch lift.
4. Install New Springs and Shocks: Install the new, longer rear coil springs. Install the new rear shock absorbers.
5. Install Adjustable Panhard Bar: Replace the factory panhard bar with your new adjustable one, such as our SAO HD Adjustable Panhard Bar. You will adjust its length later to re-center the axle.
6. Raise the Axle and Reassemble: Raise the axle back into place and reconnect the sway bar end links.
Final Steps and Alignment:
1. Install Wheels and Lower Vehicle: Reinstall all four wheels and lower the vehicle to the ground. Torque the lug nuts to the factory specification.
2. Adjust Panhard Bar: With the vehicle on the ground and at its new ride height, adjust the panhard bar until the rear axle is perfectly centered under the vehicle.
3. Get a Professional Alignment: This is a critical, non-negotiable step. A professional alignment is required to set the caster, camber, and toe to the correct specifications. Failure to do so will result in poor handling and rapid tire wear.
Guide 2: Installing a Drill-In 2nd Gen 4Runner Roof Rack
Drilling holes in your roof can be nerve-wracking, but it is the only way to securely mount a heavy-duty roof rack capable of supporting a rooftop tent and other gear. The key is to measure carefully, use the right tools, and seal everything properly.
Tools and Preparation:
- Essential Tools: Drill, drill bits, rivet nut (or "nutsert") installation tool, tape measure, marker, painter's tape, a high-quality automotive-grade silicone or polyurethane sealant, and a deburring tool.
- Preparation: Thoroughly clean the roof of your 4Runner. Have a friend available to help you lift and position the rack.
Installation Steps:
1. Position the Rack: With a helper, carefully place the roof rack side rails onto the roof. Position them according to the manufacturer's instructions, ensuring they are parallel to each other and centered on the roof.
2. Mark the Holes: Use painter's tape to protect the paint. Once you are satisfied with the position of the rails, use a marker to carefully mark the center of each mounting hole.
3. Remove the Rack and Double-Check: Remove the rack from the roof. Carefully re-measure the marked locations to ensure they are accurate. Measure twice, drill once!
4. Drill Pilot Holes: At each marked location, drill a small pilot hole. This will help guide the larger drill bit and prevent it from wandering.
5. Drill Final Holes: Use a drill bit that is the correct size for your rivet nuts to enlarge the pilot holes. Use a deburring tool to clean up the edges of the holes.
6. Paint and Protect: Apply a small amount of touch-up paint to the bare metal edges of the drilled holes to prevent rust.
7. Install the Rivet Nuts: Use the rivet nut tool to install a rivet nut into each hole. This tool compresses the rivet nut, creating a threaded insert in the sheet metal of the roof.
8. Seal the Rivet Nuts: Apply a generous bead of high-quality sealant around the base of each installed rivet nut. This is the most critical step for preventing leaks.
9. Mount the Rack: Place the rack back onto the roof, aligning the mounting holes with the newly installed rivet nuts. Apply another small bead of sealant to the underside of the rack's mounting feet for extra protection.
10. Bolt it Down: Insert the mounting bolts through the rack and into the rivet nuts. Hand-tighten all the bolts first, then go back and torque them to the manufacturer's specifications.
11. Assemble and Inspect: Assemble the crossbars and any other components of the rack. Clean up any excess sealant. After the sealant has cured (check the product's instructions), perform a water test to ensure there are no leaks.
Guide 3: Installing and Aiming Projector Headlights
Upgrading to a set of our SAO projector headlights is a relatively simple installation that yields dramatic results. The process is mostly plug-and-play, with the most important part being the final aiming.
Installation Steps:
1. Disconnect Battery: As a safety precaution, disconnect the negative terminal of your battery.
2. Remove Grille and Corner Lights: As detailed in the previous section, remove the front grille and the corner lights to gain access to the headlight housings.
3. Remove Old Headlights: Unbolt the four bolts securing each headlight housing and pull them forward. Disconnect the factory wiring harness.
4. Prepare New Wiring (if applicable): Our projector headlights often come with a dedicated wiring harness that draws power directly from the battery. This ensures the powerful projectors get a stable voltage. Run this harness according to the instructions, connecting it to the battery and routing the trigger wires to the factory headlight connectors.
5. Install New Headlights: Mount the new projector headlight housings and secure them with the factory bolts.
6. Connect Wiring: Connect the new wiring harness to the projectors.
7. Reassemble and Reconnect: Reinstall the corner lights and grille. Reconnect the negative battery terminal.
The Critical Step: Headlight Aiming
Proper aiming is what separates a professional-grade lighting upgrade from a dangerous, glaring mess. Do not skip this step.
1. Find a Level Surface 25 Feet from a Wall: Park your 4Runner on level ground with the headlights exactly 25 feet away from a flat, vertical wall.
2. Measure Headlight Centerline: Measure the height from the ground to the very center of your headlight projector lens. Let's say this is 36 inches.
3. Mark the Wall: On the wall, use a tape measure and a level to create a horizontal line of tape at the exact same height (36 inches in our example).
4. The Target Drop: The top of your low beam cutoff should be aimed slightly *below* the headlight centerline to account for the beam's angle over distance. A standard drop is 2.1 inches at 25 feet. So, you will make another horizontal line of tape 2.1 inches *below* your first line. This is your target cutoff line.
5. Adjust the Beam: Turn on your low beams. You will see a distinct, sharp cutoff line. Use the adjustment screws on the back of the headlight housing to move the beam up or down and left or right until the flat part of the cutoff is perfectly aligned with your lower target tape line.
6. Check High Beams: Once the low beams are aimed, your high beams should be correctly aimed as well, with the brightest spot centered just above the low beam cutoff.
By taking the time to follow these detailed installation guides, you can ensure that your 4runner mods 2nd gen are not only stylish and functional but also safe and reliable. A well-built rig is a source of pride and the key to countless memorable adventures. For all your parts and accessory needs, be sure to visit the Standard American Outdoors shop.
The 2nd Gen 4Runner Community: A Culture of Adventure
Owning a 2nd generation Toyota 4Runner is about more than just owning a vehicle; it’s about belonging to a vibrant and passionate community. This is a culture built on a shared appreciation for a classic machine and a collective desire for adventure. The 2nd gen community is a global network of enthusiasts, builders, and explorers who are always willing to share their knowledge, lend a helping hand, and inspire one another to push the boundaries of what’s possible.
From online forums and social media groups to local meetups and trail runs, the 2nd gen 4Runner community offers a wealth of resources and camaraderie. Whether you are a seasoned mechanic troubleshooting a complex engine swap or a newcomer asking for advice on your first modification, you will find a supportive and welcoming group of people who are eager to share their experiences. This sense of community is one of the most rewarding aspects of owning a 2nd gen 4Runner. It transforms the solitary act of building a vehicle into a shared journey, a collaborative effort to preserve and celebrate these iconic SUVs.
At Standard American Outdoors, we are proud to be a part of this incredible community. We are not just a business; we are enthusiasts, just like you. We have spent countless hours on the trails, in the garage, and online, learning from and contributing to the collective knowledge of the 2nd gen community. Our blog, our products, and our customer service are all a reflection of our deep commitment to this culture of adventure.
We encourage you to immerse yourself in this community. Join the forums, follow the social media groups, and attend local events. Share your build, ask questions, and learn from the experiences of others. The friendships you will make and the knowledge you will gain will be just as valuable as any modification you make to your vehicle. The 2nd gen 4Runner is the vehicle that brings us together, but it is the community that makes the journey unforgettable.
Conclusion: Your Adventure Awaits
The 2nd generation Toyota 4Runner is more than just a classic SUV; it's a platform for adventure, a symbol of durability, and a canvas for personal expression. Throughout this guide, we have journeyed deep into the world of 4runner mods 2nd gen, from the foundational upgrades of a 2nd gen 4runner roof rack and high-performance 2nd gen 4runner headlights to the comprehensive enhancements of suspension systems, armor, and engine performance.
Our mission at Standard American Outdoors is to be more than just a parts supplier. We strive to be a cornerstone of the 2nd gen 4Runner community, providing the expert knowledge, in-depth guides, and premium products you need to build the rig of your dreams. We've shared our passion and expertise in this guide, not just to sell products, but to empower you to make informed decisions and to tackle your build with confidence. We understand that every modification is a step towards creating a vehicle that is uniquely yours, a reliable partner for the adventures that lie ahead.
Whether you are planning a weekend camping trip or a months-long overland expedition, the modifications you choose will define your vehicle's capability and your experience. A robust suspension lift will carry you over rugged terrain, a powerful set of projector headlights will safely guide you through the darkest nights, and a versatile roof rack will ensure you have all the gear you need for a self-sufficient journey. Each component works in concert to create a machine that is greater than the sum of its parts.
We encourage you to use this guide as a roadmap. Refer back to the installation instructions, compare the product recommendations, and let the information here inspire your build. The journey of modifying your 2nd gen 4Runner is a reward in itself, a process of learning, building, and creating.
Your Next Step Starts Here
Are you ready to transform your 2nd gen 4Runner? Explore our full range of high-quality parts and accessories in the Standard American Outdoors Shop. From our best-selling 3-inch complete lift kit to our exclusive lineup of projector headlights, we have the curated, performance-tested products you need to take your build to the next level.
Don't forget to connect with us and the wider community. Share your build, ask questions, and become part of the movement that celebrates this incredible vehicle. Your ultimate adventure awaits, and we are here to help you build the 4Runner that will take you there.
Frequently Asked Questions About 2nd Gen 4Runner Mods
Q: What is the best first modification for my 2nd gen 4Runner?
A: The best first modification depends on your specific needs and goals. However, for most owners, upgrading to a quality set of all-terrain tires is the single most impactful modification you can make. Tires are the only point of contact between your vehicle and the trail, and a good set of A/T tires will dramatically improve your traction and capability.
Q: Do I need to lift my 4Runner to fit larger tires?
A: It depends on the size of the tires. You can typically fit tires up to about 31 inches in diameter on a stock 2nd gen 4Runner without a lift, though you may need to do some minor trimming. For anything larger, a suspension lift is required.
Q: Are LED headlight bulbs a good upgrade for my 2nd gen 4Runner?
A: Simply replacing your halogen bulbs with LED bulbs in the factory reflector housings is not recommended. The factory reflectors are designed for halogen bulbs, and LED bulbs will create a scattered, glaring beam pattern. For the best results, invest in a full projector retrofit.